

Text Explorer
There’s a story hiding in every open-ended response. Text Explorer’s job is to find it. Connect your data, run preprocessing, and you’ll get a live, filterable Text Auto Report packed with sentiment breakdowns, key themes, and AI-generated summaries — no reading through thousands of comments required.
For teams who want to dig deeper, the Workbench lets you configure specific analysis types, build custom charts, and explore the data on your own terms. But for most users, the Text Auto Report is where the magic happens.
The basic workflow
Section titled “The basic workflow”-
Create a project — Connect a data source and give your project a name
-
Set up the project — Select your text variables, add supporting variables for filtering, and run preprocessing
-
Explore your Text Auto Report — Your report is generated automatically. Filter by segment, browse sentiment and themes, ask questions with Ask EVE, and share with stakeholders
-
Share or export — Share the project or report with colleagues, or export chart outputs in PowerPoint, Excel, or JSON
Opening Text Explorer
Section titled “Opening Text Explorer”There are three ways to open Text Explorer:
-
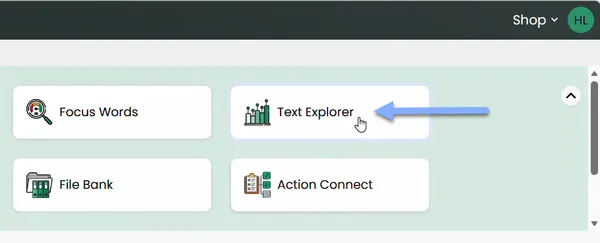
Application grid — On the Portal home page, click the Text Explorer card in the application grid. You may need to scroll to find it depending on your screen size.
-
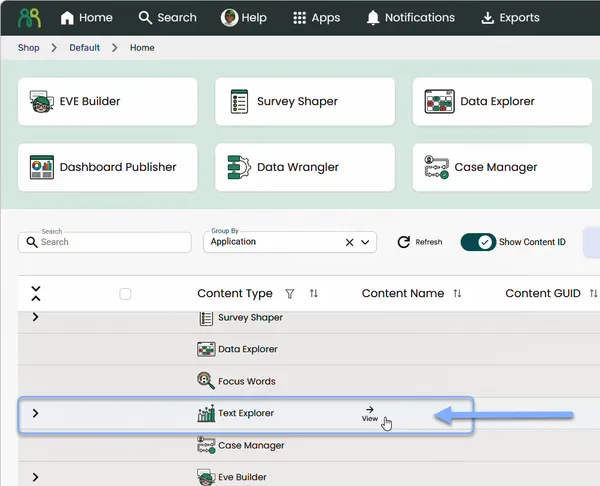
Content table — Hover over the Text Explorer group heading in the portal home content table and click the View icon.
-
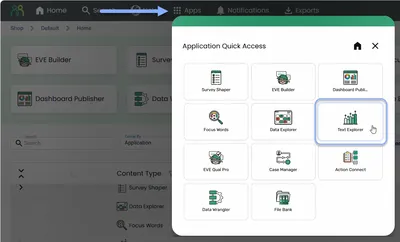
Application quick access — Click the Apps button in the header bar, then select Text Explorer from the quick access dialog.
Text Explorer home
Section titled “Text Explorer home”When you open Text Explorer, you’ll see all your projects listed in the content table. This is your home base for creating, opening, and managing everything.
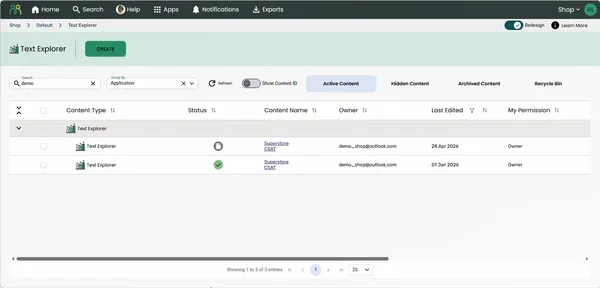
Click a column heading — for example Content Name or Last Edited — to sort the list, and click it again to reverse the order. Use Search to find a project by name, and the Active Content, Hidden Content, Archived Content, and Recycle Bin tabs to switch views.
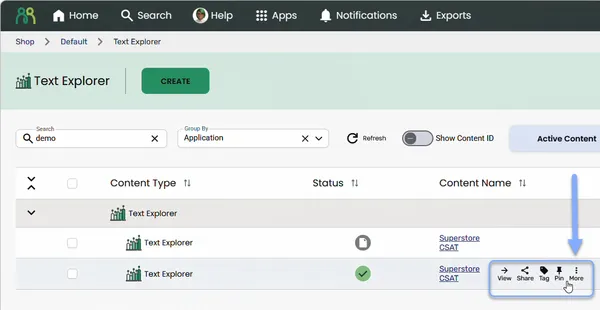
Hover over any row in the content table to reveal its action buttons.
| Button | What it does |
|---|---|
| View | Opens the Text Auto Report (Success) or setup step (Draft) |
| Share | Opens the share dialog |
| Tag | Add tags to the project |
| Pin | Pin the project for quick access |
| More (⋮) | Opens the full options menu |
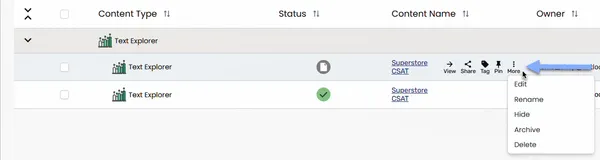
The options available in the More menu depend on the project’s status.
Available for all projects:
| Option | What it does |
|---|---|
| Edit | Opens the project — the set-up wizard for a Draft project |
| Rename | Opens the Rename Project dialog |
| Hide | Hides the project from the Active Content view |
| Archive | Archives the project |
| Delete | Moves the project to the Recycle Bin |
| Unsubscribe | Stops notifications about this project. Shows as Subscribe if you’re not subscribed. |
| Notification preferences | Choose which notifications you get about this project. Only shown while you’re subscribed. |
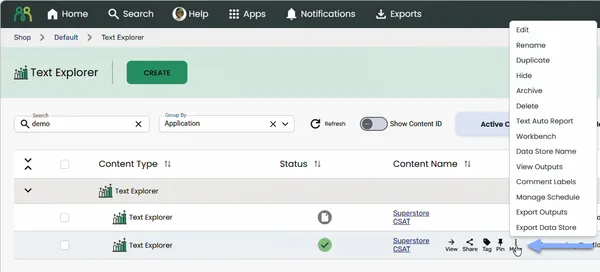
Additional options for projects with a Success status:
| Option | What it does |
|---|---|
| Duplicate | Creates a copy of the project’s analysis configuration and data store settings |
| Text Auto Report | Opens the Text Auto Report for this project |
| Workbench | Opens the project in the Workbench |
| Data Store Name | Shows the name of the source data store connected to this project |
| View Outputs | Opens the project in the read-only output viewer |
| Comment Labels | Configure label categories for tagging individual records |
| Manage Schedule | Set up or edit a recurring analysis run |
| Export Outputs | Export saved chart outputs (PowerPoint, Excel, or JSON) |
| Export Data Store | Export the underlying processed dataset |
Creating a new project
Section titled “Creating a new project”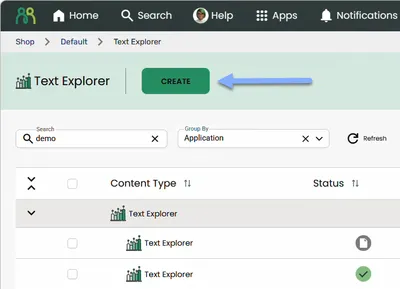
- Click Create at the top of the content table.
- In the New Project dialog, enter a Project Name — choose something descriptive so you can identify it later. The dialog shows what will be created: a Text Auto Report and a Workbench, both named after your project.
- Click Next. The set-up wizard opens at the Choose Data Source step.
Managing projects
Section titled “Managing projects”Opening a project
Section titled “Opening a project”Click View to open a project. Draft projects open at the setup step. Projects with a success status open in the Text Auto Report.
Editing a project
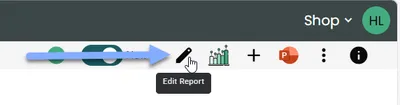
Section titled “Editing a project”Once a project has run, its data source can’t be changed. To make changes to an existing report — such as adding variables, report pages, or tabs — use the Edit Report button in the Text Auto Report toolbar. It reopens the set-up wizard with your existing settings.
See Editing report settings for full details on what can be changed.
Duplicate a project
Section titled “Duplicate a project”Duplicate is available for projects with a Success status. It creates a copy of the project’s analysis configuration and data store settings. Saved chart outputs are not copied.
- Hover over the project row and click More (⋮).
- Select Duplicate.
- Enter a name for the new project and click OK.
Rename a project
Section titled “Rename a project”- Hover over the project row and click More (⋮).
- Select Rename.
- Enter the new name and click OK.
Delete a project
Section titled “Delete a project”- Hover over the project row and click More (⋮).
- Select Delete.
The project moves to the Recycle Bin and is permanently removed after 30 days. To permanently delete immediately, open the Recycle Bin, select the project, and confirm by typing DELETE.
Share a project
Section titled “Share a project”- Hover over the project row and click the Share icon.
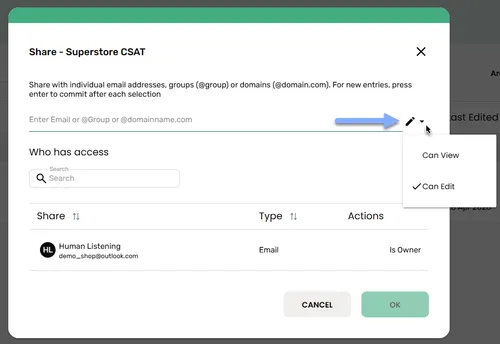
- In the share dialog, enter an email address, a group (@group), or a whole domain (@domain.com), pressing Enter after each one.
- Choose a permission from the pencil dropdown next to the field — Can Edit (the default) or Can View.
- Click OK.
Tick Subscribe next to a person to send them notifications about the project.
| Permission | What they can do |
|---|---|
| Is Owner | Full access, including the ability to manage sharing and delete the project. Shown against the project’s owner in the Who has access list; it can’t be given to anyone else. |
| Can Edit | Full access to the project, including the Text Auto Report and Workbench |
| Can View | Can open and view the project but cannot make changes |
Comment Labels
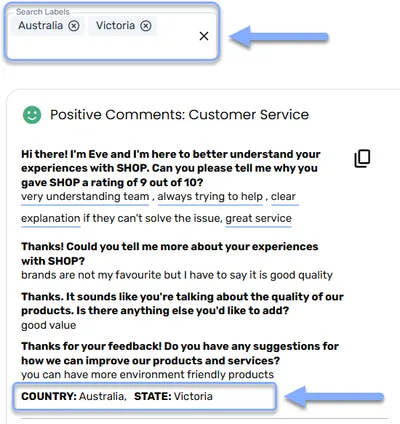
Section titled “Comment Labels”Comment Labels let you surface respondent-level metadata alongside each comment in the Text Auto Report. For example, adding a “Region” variable means every comment shows the respondent’s region underneath it — giving reviewers immediate context without having to cross-reference another dataset.
Comment labels are variables from your project’s source data, not tags you create manually. Up to 10 label variables can be added per project.
- Hover over the project row and click More (⋮).
- Select Comment Labels.
- The Comment Labels page opens. Drag variables from Available Variables on the left into Label Variables (Max 10) on the right.
- Click Save.
If any newly added variable wasn’t already included in the project, preprocessing will rerun automatically after saving.
Once configured, label values appear beneath each comment in the comment viewer and sub topic deep dive section of the Text Auto Report. A chip-based filter bar also appears, letting users slice comments by any combination of label values.
Project statuses
Section titled “Project statuses”Every row has a status badge so you know exactly where things stand.
| Status | What it means | |
|---|---|---|
 | Draft | The project has been created but preprocessing hasn’t run yet. |
 | Processing | Text is actively being preprocessed and analysed — sit tight. |
 | Success | All done. The Text Auto Report is ready. |
 | Error | Something went wrong during processing. Open the project to see what happened. |
Frequently asked questions
Section titled “Frequently asked questions”Why can’t I see the Text Explorer application card?
Scroll down on the Portal home page — the card may be below the fold depending on your screen size. Alternatively, check the application quick access menu via the Apps button in the header bar.
I can’t find my project — where has it gone?
Check the search bar at the top of the content table — if there’s a search term in there, clear it and your project should be visible.
Do I have to use the Workbench, or is the Text Auto Report enough?
For most users, the Text Auto Report is all you need — it covers sentiment, key themes, topic deep dives, emotional insights, and more, all in one filterable view. The Workbench is there when you want to customise your analysis, build specific chart types, or configure things like Diff Terms or Text Drivers. Start with the report and see if you need more.
What type of data does Text Explorer work with?
Text Explorer is built for open-ended text responses — survey verbatims, interview transcripts, customer comments, and similar unstructured text. You can also add numeric and categorical variables from the same data source as supporting variables for filtering, segmentation, and comparison.
Can I have multiple analysis types in one project?
Yes. A single project can run any combination of Sentiment, Top Terms, Diff Terms, Text Drivers, and Co-Occurrence analyses. Each is configured separately in the Workbench and contributes its own charts to the output library.
My project shows an Error status — what do I do?
Open the project to see the details. The most common culprits are text variables with very little actual text in them, or a data store configuration issue. If the error message doesn’t point you in the right direction, contact your Account Manager for support.
I deleted a project by mistake — can I get it back?
Yes, if it’s still in the Recycle Bin. Projects are permanently removed after 30 days, so act quickly. Open the Recycle Bin, find your project, and restore it from there.