

Survey Shaper
Survey Shaper is HumanListening’s survey creation and distribution tool. It combines flexible question types with powerful logic and automation, giving you complete control over your survey experience from design through analysis.
The basic workflow
Section titled “The basic workflow”Survey Shaper follows a five-stage process from design to insights:
-
Create a project
Start by creating a new survey project in Survey Shaper. Give it a meaningful name and description to help you and your team identify it later.
-
Build your survey
Start from scratch or use a survey template to get going quickly. Build your survey structure in the visual flowchart, add question types, configure logic and branching, and use action commands for automatic calculations. Preview your work, then publish when ready.
-
Collect responses
Distribute your published survey through email, SMS, or external channels. Upload your contact list, set up quotas to control sample composition, and configure alerts to monitor response rates.
-
Analyze results
Access your response data through the Survey Data Store. Connect to Data Explorer for cross-tabulation, Text Explorer for open-ended analysis, Data Wrangler to view, recode or transform data, or Dashboard Publisher to display real-time results.
-
Manage your project
Share access with team members, close the survey when data collection is complete, and archive finished projects to keep your workspace organized.
Opening Survey Shaper
Section titled “Opening Survey Shaper”There are several ways to open Survey Shaper:
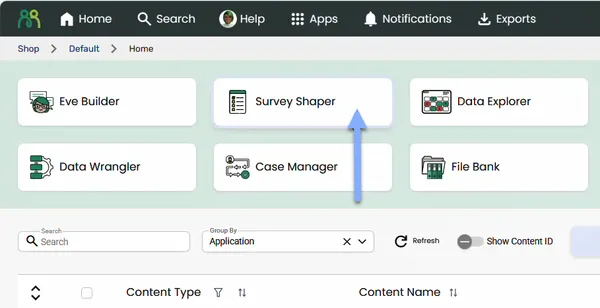
- Application grid — On the portal home page, click the Survey Shaper card in the application grid
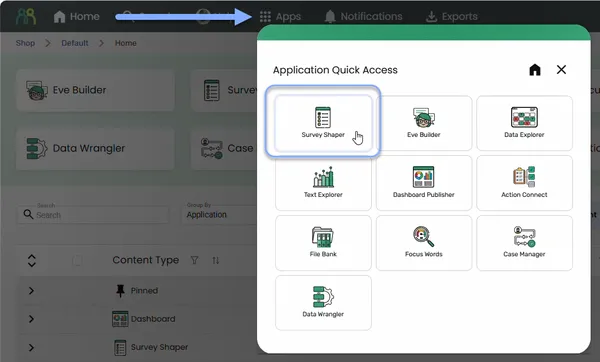
- Application quick access — Click the Apps button in the header bar, then select Survey Shaper from the quick access dialog
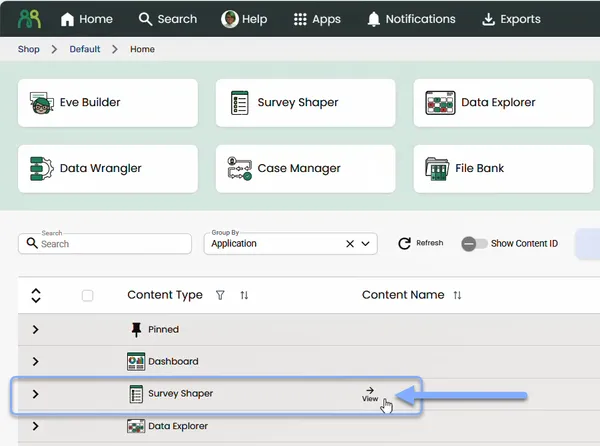
- Content table — Hover over the Survey Shaper application header row in the content table and click the View icon to open the application
Survey Shaper content table
Section titled “Survey Shaper content table”When you open Survey Shaper, you’ll see the content table with collapsible sections for each type of survey content:
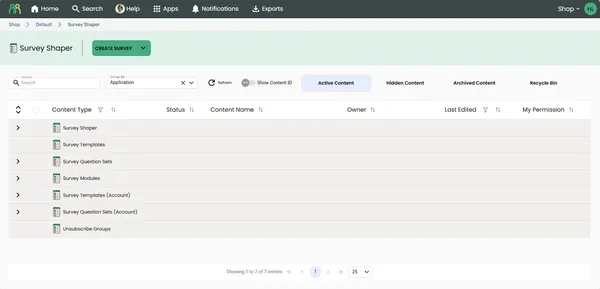
Content types
Section titled “Content types”| Content type | Description |
|---|---|
| Survey Shaper | Your survey projects — the main content you’ll work with |
| Survey Templates | Reusable starting points for new surveys within your project |
| Survey Question Sets | Collections of frequently used questions you can drop into any survey |
| Survey Modules | Self-contained “mini surveys” that can be embedded within a survey |
| Survey Templates (Account) | Templates shared across your entire account, available to all projects |
| Survey Question Sets (Account) | Question sets shared across your entire account |
| Unsubscribe Groups | Manage opt-out lists for survey distribution |
Click the expand arrow next to a content type to see all items of that type.
Creating a new project
Section titled “Creating a new project”- Open Survey Shaper using one of the methods above.
- Add new survey — Click the CREATE SURVEY button.
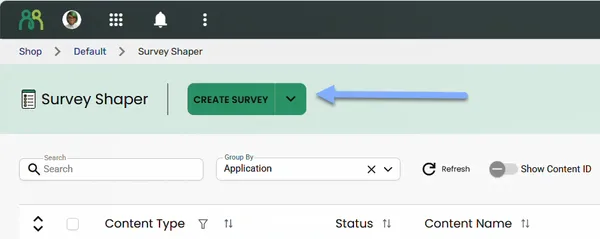
- Choose your starting point — Select whether to create a new survey from scratch or create from a template.
This opens the new survey in the editor, where you can build it in the survey flowchart. If you have Survey Editor (Beta) turned on, it opens inside Portal. Otherwise, Survey Editor (Legacy) opens in a new tab.
Working with existing surveys
Section titled “Working with existing surveys”Opening a survey
Section titled “Opening a survey”Once you’ve created a survey, there are a few ways to get back into it:
- From Survey Shaper — Open Survey Shaper and click the survey name in the content table to open the survey in the editor
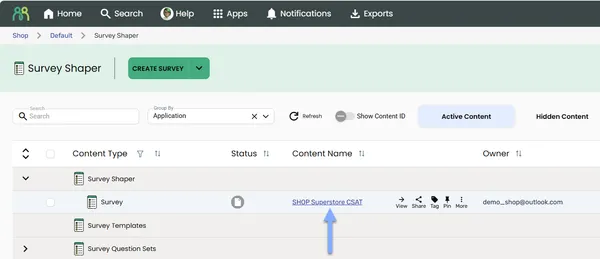
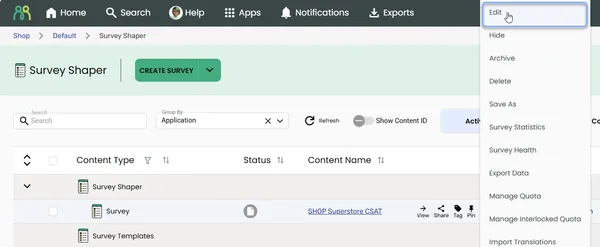
- From Survey Shaper (more menu) — Open Survey Shaper, hover over the survey and click the more icon (⋮), then select Edit to open the survey script
- From Portal home — Hover over the survey in the Portal home content table and click the more icon (⋮), then select Edit
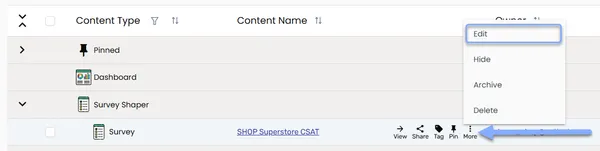
Clicking the survey name in Survey Shaper opens Survey Editor (Beta) if you have it turned on, or Survey Editor (Legacy) if not. Edit in the more menu always opens Survey Editor (Legacy) in a new tab. With Survey Editor (Beta) turned on, the more menu also has Edit in Survey Editor (Beta).
Editing a published survey
Section titled “Editing a published survey”To modify a survey that has been published, you must first save a new version of the survey.
From the Survey Shaper content table: click the more icon (⋮) on the survey and select Scripting > Save As New Version.
From the editor:
- Open the survey, then select Save As from the SAVE menu
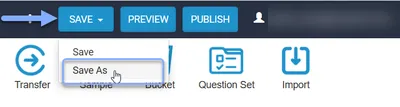
- Select New Version
- Click OK
Open the survey and click Create New Version in the header. The button only appears on a published version.
You can also click the arrow next to Save, select Save As, choose New Version, then click Next.
For more on managing survey versions, see Version Control.
Viewing survey statistics
Section titled “Viewing survey statistics”The survey statistics page gives you a snapshot of your survey’s response data: completion rates, response counts, and collection progress. The quickest way there is to click the survey name in the Portal home content table. You can also select Monitor Responses > Survey Statistics from the survey’s more menu (⋮) in Survey Shaper, or open it from the editor.
See Open Survey Statistics for every way in.
Accessing sample management
Section titled “Accessing sample management”Need to upload contacts, manage your respondent list, or check on mail-outs? The sample page is where all of that happens. Select Collect Responses > Sample & Invitations from the survey’s more menu (⋮) in Survey Shaper, or open it from the editor.
See Open the sample page for every way in, and Manage sample for working with sample data.